Most all sewn books have a two basic components: a text block and a cover. Though the way a book is sewn and covered varies quite dramatically from binding to binding, the text block for a sewn book is quite similar.
This is meant as reference for anyone wanting to make their own books. I decided to make some fairly detailed instructions for some steps that are commonly used in all kinds of binding methods. For example, you can use these instructions as you complete a soft cover Coptic book. Here’s what you’ll need to prepare the text block:
Supplies
- paper
- bone folder
- metal ruler
- teasing needle (or T pins)
- book press, weights, or heavy books
- X-acto knife (optional; not necessary if you want a torn edge on your signatures)
- punching tray (or a stiff cardboard box)
- something heavy to press your signatures with (like a big book)
Planning the text block
- Start by deciding the dimensions of your book. Try to use your sheet of paper wisely to get the most pages out of a piece of paper with the least amount of waste. But if you do end up with substantial end cuts, consider making some little matchbox size books. For example, if my text block paper comes in sheets of 26 × 40 inches grain long (meaning the grain runs parallel to the 40 inch side), I may decide to do my signatures 8 inches × 11 inches, and I would get 6 leaves per sheet of paper with only a few inches of waste.
- Once you have determined the dimensions of your signature, you will need to tear the large sheets of text block paper down to rough size. Yes, you will need to start out with pieces that are slightly bigger than your finished signature; you will cut the signatures to final size after they have been folded together.
The rough-size pieces will need to be 2 times the width of your finished signature + 1 inch (if you want a torn edge on your signatures, this needs to be +2 inches) by the height of your finished signature +2 inches (if you are tearing your signatures you will want this to be + 3 inches). So if I want my finished signature to be 5 inches × 8 inches, I would want my pieces to be approximately 11 inches × 12 inches for a cut edge, or approximately 12 inches × 13 inches for a torn edge.If you are trying to save paper, you may go a little less with the size of your end cuts, but it will make trimming your signatures more difficult, so be prepared for that. IMPORTANT: Make sure your pieces are torn so that the grain of the paper is running parallel to where the spine will be once they are folded.
Tearing down the text block
Generally, you will be starting with a rather large piece of paper and will be tearing it down to individual leaves for your book.The way you tear down your paper will depend on how many pieces you are tearing it into, so this is just a general guide.In this example, I will be tearing down a 24 × 38-inch piece of paper into 8 pieces (leaves).
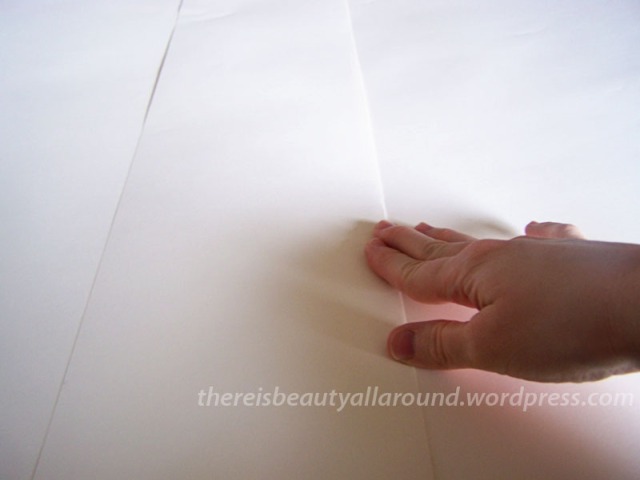
- To tear your paper, fold it in half, lining up the edges and pressing the fold down with your fingers. Crease with your bone folder (when I did these pictures, I could not find my bone folder, so you’ll have to imagine me using that to crease and tear the paper).
 (Creasing the folded edge of the paper)
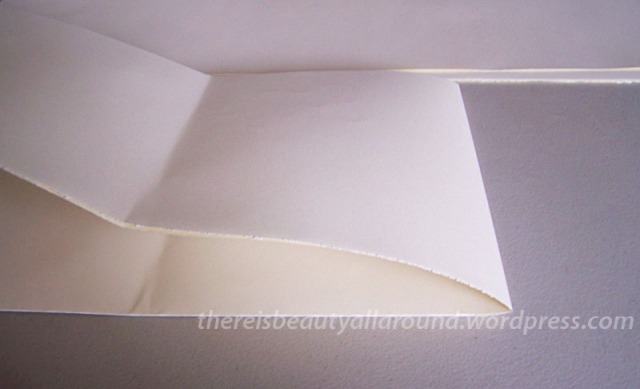
 - Slide the edge of your bone folder in between the two halves of the paper, along the fold, to tear the paper in half. I tear gradually, in pieces about the length of the bone folder, rather than slitting it all at once like you would to open an envelope.
 (In my example, I have used the edge of the ruler, which is an okay substitution for a bone folder in a pinch, but it may create badly torn edges.)
 (Why you should use a bone folder)
 - Continue folding and tearing your paper in this manner until you have your leaf-sized pieces (which will be twice as wide as your signatures).
Alternate way:
It is possible to fold a single piece of paper into a signature; this is how most commercially made books are bound. You will likely still need to tear your large sheet of paper down a bit before you can fold it into a signature. Your piece of paper will need to be twice the height of your text block, plus 2 inches (more for torn edges), and 4 times the width of your text block plus 4 inches (more for torn edges). Make sure your grain is parallel to the spine (in this case, the shorter side of your piece of paper.
- Fold your paper in half perpendicular to the direction of the spine (hot-dog style). Crease well.
- Insert your bone folder in between the sheets of paper and tear along the fold until a few inches past halfway. The purpose of this is to release tension when you fold the paper in half two times, so the paper will lay flat.

- Now fold your paper in half, parallel to the spin (hamburger style). Crease well.

- Now fold your paper in half again (hamburger style). Crease well.

- Press these signatures and then trim them to the correct size as you would with normally prepared signatures.
Folding and pressing the signatures
- After you have torn your pieces to rough size, stack 3–4 pieces of paper together (3 if your paper is really thick like watercolor paper, 4 if it is average thickness).
- Fold the stack of paper in half with the fold parallel to the spine of the book. Crease first with your fingers and then crease well with the bone folder.
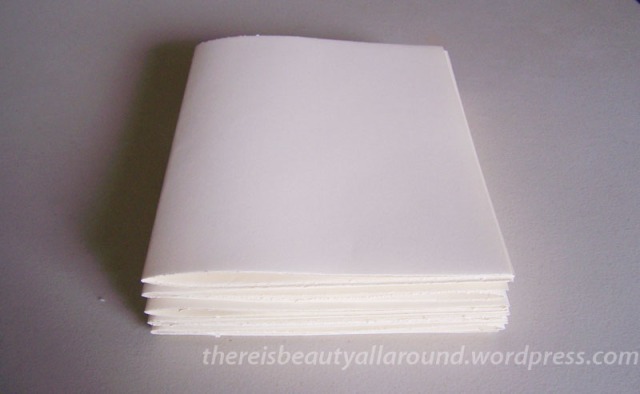
- Once you have folded all your signatures, stack them with half the spines facing one side and half facing the other side.
 (Stacked signatures)
 - Place in a book press or under a heavy flat object (I use old textbooks) and press for half an hour or more to set the creases.
 (Pressing the signatures. This is my go-to pressing book; a nice size and heavy—the inside is pretty good, too.)
Trimming your signatures
- Tear or cut the signatures down to the final size. If you don’t have a board shear, you can use a metal ruler and an X-acto knife to trim the edges. If you are tearing your signatures, you will want to tear along the edge of a metal rule; be sure to press down firmly on the ruler so it doesn’t shift and make your tear crooked.
- Start by cutting or tearing about 1 inch off the bottom of each signature; this does not need to be an exact measurement because you’ll be finalizing the height with the third cut, but you do need to make sure the tear or cut is perpendicular to the spine (it helps to use a grided mat to guide your cuts/tears).
 Be sure to keep track of which edge of the signature you have cut (i.e., lay all the cut signatures the same way so you know which side needs to be cut still).
 - Cut/tear the amount off the for-edge necessary to make your signature the desired width. This cut does need to be exact and perfectly parallel to the spine in order for your signatures to be even and square.
- Cut/tear the remaining excess off the top (uncut) side of your signature, being sure to make this cut/tear perpendicular to the spine.
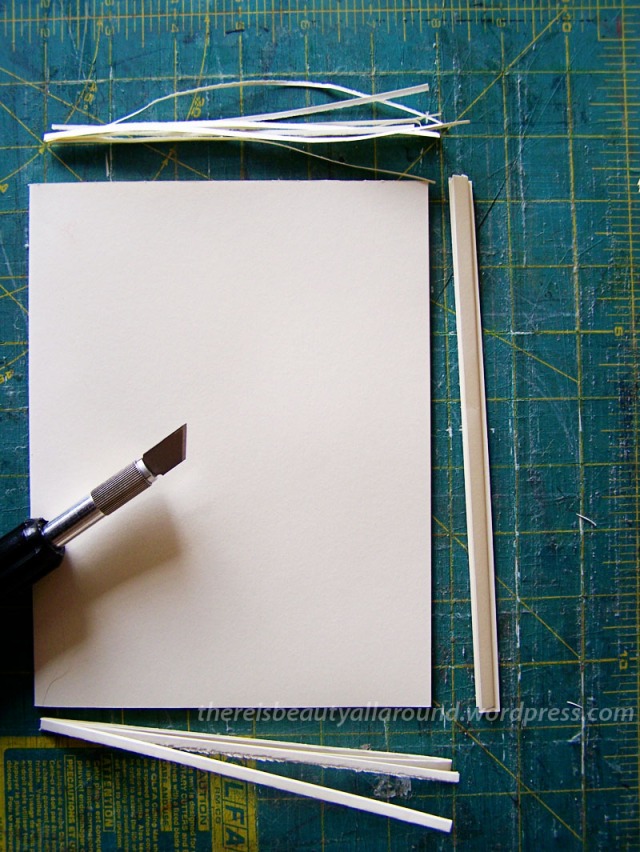
 (The trimmed signature. This kind of shows what not to do: you really want to leave a wider margin to trim off than I had in this picture.) Your signatures should all be very close to the same size. Be as exact as possible.
Punching sewing holes in the signature
Every sewn binding has rules about the placement of holes for sewing. Know these rules for the binding you are doing, then make a template that shows where the holes will be for your signatures. There are many ways to do this, but here is the way I’ve worked out.
- Start with a narrow strip of paper that is exactly the height of your signature. Mark the location of the holes along one edge. For exposed bindings like a Coptic binding, I would measure out each hole location to be exact, but for bindings where the spine is hidden, like a flat-back or case bound book, you can use approximate hole placement.For the latter case, if you need 4 evenly spaced sets of holes, fold the narrow strip of paper in half and then in half again. Then unfold and mark where the folds are. You can now indicate any additional holes in relation to these 4 evenly spaced holes (e.g., kettle stitches at the head and tail of the book, or a second hole next to each of the 4 holes in between which your linen tape will be sewn).
- You have two options for transferring these hole placements to your signatures. I’ll tell you how I was taught to do with, then I’ll show you how I do it (the first way may be more correct and is easier, but I just like the way I do it, so whichever works for you is fine).The way I was taught:
(a) Draw lines on your narrow strip of paper perpendicular to the long edge at every place you marked a hole.
(b) Fold the narrow strip of paper in half.
(c) Lay your signature open in a V-shaped punching tray (something like this) with the narrow strip of paper lying in the center fold of your signature, lined up perfectly with the head and tail of your signature.
(d) Using your teasing needle or T pin, punch straight down along the center fold at each place you indicated a hole.The way I do it: (a) start with your lines marked out on a paper ruler that is the same height as your signature.
(b) Stack your signatures together and make sure they are all jogged together so the line up well. I made a handy little tray with one right corner that lines up my stack of signatures, but you could also use jumbo butterfly clips to hold them in place.
(c) Weight the stack down with a book weight, smooth rock, or a can of beans so the stack won’t shift (sorry, I didn’t take a picture of this step).
(d) draw a line straight down along the spine of your stack of signatures at each point where you marked a hole on the paper ruler.
(e) When you are done, your stack of signatures will have perfectly lined-up marks to indicate where to punch the holes. also make a light mark along one end of the stack to show which side is the top of the text block.
(f) Lay one signature at a time, fore edge down and open, over the edge of a firm cardboard box or an inverted-V punching tray. Punch holes straight down with a teasing needle, T pin, or awl where you marked along the spine, being sure not to make the holes too big (holes for a Coptic binding will probably be larger than for a flat-back or case-bound book). (This example shows holes for a Coptic-bound book. This would look very different for a case-bound book.)
Once you have punched all the holes, stack you signatures together, making sure you have them all facing the same direction (i.e., all the tops facing the same way) and set them aside, ready to be sewn together in whichever binding you have chosen.

OMG!!! Your tutorial helped me soo much! Thank you:) I have a question about printing onto the pages. I want to make a book with my drawings in it, but I’m afraid that it might be difficult to print all of my drawings onto the extra long sheet of paper, fold it, cut it, and make sure all of my pictures are in the right place. I was thinking I could just paste my drawings into the book, but I’m not sure it would look professional. How would you go about placing artwork onto the paper itself before cutting and making sure the drawings do not get put into the wrong place and cut or folded in the process?
I’ve been thinking about this for a little while, and I wish I had a great answer, but I don’t. First, if you want to paste your drawings in, that would a perfectly acceptable solution. Many commercially published art books use this method to insert high quality color illustrations so they don’t have to pay as much to print the whole book that way. If you want to print directly onto your pages, you would need to align everything so that when you cut your signatures, the images will be centered correctly. You may want to get your book cut on a paper guillotine at a press or print shop. One final thing to remember is to make sure the grain of everything (including pasted-in images) runs parallel to the spine. Good luck!
I love that I found your tutorial! I’m just getting started with bookbinding and all the information can be overwhelming. You make it look more simple. Thank you!