Three Big B’s

For Babka, Baby, and Blog. First the babka. 2 mini loaves happy girl slice 2 slice

Thank goodness this unholy concoction, containing over a pound of butter and sugar, each, and nearly 2 and 1/2 pounds of chocolate (!!) can be frozen, because I could only justify making this recipe by promising that I would freeze two of the three loaves to have when my husband is here to enjoy it. The impetus for this dessert is innocent enough. My mother-in-law shared a loaf of sweet bread studded with chocolate chips, and I thought to myself, hmm, these people are onto something. So I did a quick search at my favorite food blog and came up with chocolate babka. And at first glance, it looked simple enough, a sweet bread dough swirled with chocolate filling and topped with streusel. Closely examining the ingredient list, however, gave me reason to pause. Did I really want to sink that amount of indulgent ingredients into one baking endeavor? The craving won out, however, and it’s not until you’re standing there, looking at two bowls on the counter, one containing your risen dough, and one containing your chocolate/butter/sugar/cinnamon mixture and finding, in alarm, that one is unexpectedly more full than the other, that you realize you may have, perhaps, made a slight error in judgement. Thank goodness it’s too late to turn back at that point, because this babka, oh this babka, it is just that good. With all that said, however, I don’t see myself making it again any time soon. But you should. At least once; it’s one of those things. And after living months without access to an oven, it felt good to have a really, really good excuse to turn on the oven.

Speaking of cravings and ovens, I suppose that now is as good a time as any to announce that I am having a baby. Next month! As in, approximately five weeks from now we’ll be a family of 5. Sorry I haven’t mentioned it before, it’s just that living on the island and being pregnant without having access to good medical care has made me nervous, and I didn’t need anyone else’s well-meant comments or advice making me more nervous. I know I have really wonderful, lovely readers, but the internet is a crazy big place, and I know things like that still happen. So now that I am safely back to the United States, having survived 27-hours plane travel and layovers at 7 months pregnant taking care of two little girls all by myself, I feel comfortable sharing the exciting news. We’re having another little girl, and we are completely thrilled. It is a little bittersweet, because with the baby came the decision that we couldn’t responsibly raise small children on the Galapagos. There are just too many risks involved, mostly from poor-quality water and lack of adequate medical care, that would make it hard to have a new baby there. So we decided to leave our job and home on the Galapagos and move back to the United States.babiesSee, I’m not making this up. This was taken on our last day in Galapagos, when I was 32 weeks (3 weeks ago). My husband is currently finishing up his last month of work and then will come up before (fingers crossed) the baby comes.

The third B is for blog. I realize I’ve been a terribly negligent blogger lately (as in, the last year or so) but that is the trouble with living without internet access. It makes it rather difficult to do things on the internet. Ha. Seriously though, I’ve found that over the year, I’ve kind of lost my taste for the internet. I’ve found many worthwhile things to fill in the time, and frankly, I’m a little disgusted with myself when I get into a rut of looking at pinterest or other social media things for any extended length of time. Not that those things are bad, (and I am in no way casting judgement on people who do enjoy passing the time in this way), it’s just not really my thing, anymore. So, I’m still trying to figure out where I fit in with my blog. I do like sharing, and I love getting feedback from you, especially when there is something I can help you with. And now that I do have access to the internet on a regular basis, I will try to be a more dutiful blog and e-mail correspondent (of course, after the baby comes, all bets are off). But I don’t think I’ll be picking up the pace with posting any time soon. I hope you understand, dear readers.

Have a wonderful afternoon.

Baking again

It may not seem like that big of a deal, but when you have a more than healthy relationship with baked goods that enjoy the union of sugar and butter, being able to bake is a big thing. Especially when you live in a place without a decent bakery (meaning one that bakes sweets), let alone a cupcake or cookie boutique popping up on every corner. The problem is compounded when butter and sugar cost twice the US price, and oh yes, you don’t have an oven. In desperation, I’ve more than once resorted to some Oreo off-brand creation with an eternal shelf life. But no more. A while ago I discovered that you could cook cookies in a skillet on the stove top. The results are not exactly like a cookie fresh out of the oven; since you have to flip the cookie to get it to cook properly, you end up with two browned sides. But it’s something. And then, and even bigger breakthrough. Steam cake. Have you ever heard of this before? I hadn’t, and I wasn’t sure about it, but the concept seemed worth a try. If you can take some cake-batter-like substance and steam it into submission, why not try something other than a “steam cake” recipe. I chose banana bread from here (minus the burbon, and substituted oil since I was out of butter). Will you believe me if I told you it worked? I don’t think I would have believed it if I hadn’t tried it myself. It was almost like a miracle when I opened that pan and instead of a gooey, drippy mess I found a perfectly firm but moist banana bread.

The process is very simple. Here’s what it looks like:

how to cake

Here’s the break down.

  1. Find a pan that is big enough to fit your cake pan inside without the cake pan touching the walls of your bigger pan.
  2. Put something metal on the bottom of the pan to raise the cake pan up, but also keep it level. Old canning jars would work great for this, but I didn’t have any, so I just used forks.
  3. Fill your pan with about an inch of water. It should be just below the level of the bottom of your cake pan, but I don’t know if it would hurt the cake if the water actually touched the cake pan.
  4. Fill your greased cake pan with the batter.
  5. Place the cake pan inside the bigger pan.
  6. Tie a dish cloth around the lid of the big pan. Choose one that is big enough to tie, and one that is tightly woven (I think these are less likely to catch fire if the cloth gets hot).
  7. Put the lid on the big pan. Make sure no part of your towel is hanging where it can catch fire. THIS IS VERY, VERY IMPORTANT.
  8. Turn the heat on to medium.
  9. Let it cook for the amount of time listed in the recipe. Steaming make go a little quicker or slower, so just check it about 10 minutes before the time just to be sure. Also, keep an eye on the water level. You don’t want your pan to go dry.
  10. When your cake/bread/brownies  are done, remove the lid and take the pan of the heat. Unless you have some special grabber, it will probably be hard to get the cake pan out before it cools, so just leave it there. Leaving the lid off helps dry out the top if a little water collected on the top of your pan.

finished cake

And there you go.

I have yet to venture into other batter-baking areas, but these brownies have been calling my name, so they are next on the list.

So yeah, if you can’t use your oven for some reason, or you just want to try something a little different, give steam cooking a try.

Have a great Monday (and happy Presidents day to you US readers)!

Christmas Cookies

Here’s something fun to do this weekend with your kids (or friends, someone special, etc.) to get you into the Christmas spirit. Decorate Christmas cookies. Oh yes, as cliché as it might sound, this really is a lovely way to bring some holiday fun into your home.

cookies 2

And it does not have to be complicated. Or fancy. Or perfect (remember this last one especially if you decide to do this with little kids). It is just meant to be fun.

Making sugar cookies with my little girls was a new experience for me. I’ve always loved doing sugar cookies, especially for Christmas, but I wasn’t ready to try letting the little ones help until just recently. As with practically any activity, letting little kids help with something usually doubles the amount of time it takes, but if you can just accept that and allow yourself to ignore the messes and little mistakes tiny fingers make, you’ll find real joy sharing a new activity with your kids. And why not start with sugar cookies? A very good place to begin, if you ask me.

isa looking at cookies

Here’s the recipe I used for the cookies. I have never settled into a really great sugar cookie recipe. In fact, I think I try a new one every time I make sugar cookies, but I have to say, this is a pretty good standard one. Nothing fancy like cream cheese or sour cream, but nice and flavorful.

isabella mixing

The instructions a fairly straightforward, and I decided to let my almost 4-year-old help with the dough.

mixing 2

mixingIt went pretty well, except that part of the way through I went to get something and came back to find my little sweetie spooning unknown quantities of flour into the bowl that I had already carefully measured my flour into. I had to start over there, but it wasn’t a big deal, and she is so eager to learn, which makes it fun for me, too.

dough

Now, I have to be completely honest and say rolling and cutting out the cookies was the hardest part. Probably because I was not quite ready to give up control in this area. My two-year old was especially hard to control during that step in the process, but I should have known. She is two after all. The girls did not want to wait until the dough reached the right thickness, and the didn’t want to hear anything about trying to place the cut outs as close to each other as possible to keep the dough from having to be rolled out multiple times. No siree. I’d go to put a nicely cut cookie on the pan only to find several false starts from some anxious cookie cutters in the center of the rolled out dough, marring the whole project. It got a little tense. But after the cookies were made and the little bakers got to sample their fine work, the rest was just, well, icing on the cookies.

Here’s the recipe I used for the frosting. I halved the recipe and still had lots left over, so if you’re not a frosting0phile like me, you might want to take this approach, too.

So here’s the thing I wanted to tell you about especially. Decorating cookies does not require any special tools or skill sets. Now, I do not mean decorating cookies for Martha Stewart Magazine or some fancy cookie boutique in New York doesn’t require tools and skills. It does. Whole lists of them. But decorating cookies with your kids does not. You can even go a little fancy, if you want.

cookies close up 2

Here’s what I did to spell out a little message with just a plastic bag, some frosting, and some sprinkles.

First, fill a plastic sandwich bag with some frosting, about 1 cup to spell out Merry Christmas. Push it to one corner, then seal and twist the top so frosting won’t squeeze out that end. Snip the corner that has the frosting in it off  so you have about a 1/2 inch opening. Then take some sugar cookies in whatever shape you want (I recommend circles, squares, or shapes with at least one big area; save the snowflakes for the kids to decorate) and spell out your message one letter per cookie. After you have completed a letter, dump a generous helping of sprinkles over the whole frosted letter. You may want to gently press the sprinkles a bit to make sure they stick to the frosting. Wait 10 seconds. Then turn the cookie upside down and gently shake it to remove the excess sprinkles.

cookies

I recommend doing this over a piece of wax paper so you can gather up the falling sprinkles for use on another cookie. This went pretty well for me, especially for a first time go at it.

close up cookies
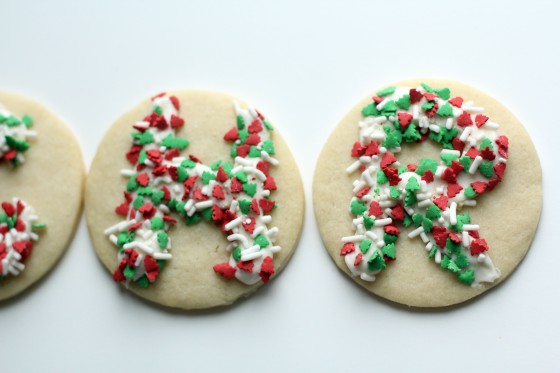
My letters turned out a little shaggy since I had big sprinkles, but I would love to see how some sparkly sugar sprinkles or nonpareils would look.

frosting

While I did the cookies this way, I let my little girl decorate as many cookies as she wanted. I didn’t expect much (she’s not even four yet) but I was amazed at how carefully she frosted each one. She was sparing with the frosting and sprinkles, and she kept telling me how careful she was being with the knife (it was a butter knife, but she associates any knife with danger).

decorating 
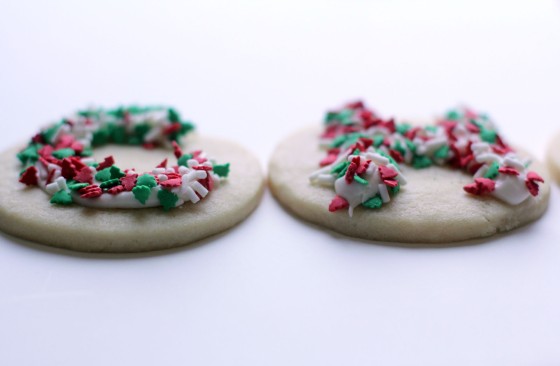
It was definitely the best part of the whole process.

eating(Well, besides eating the cookies, of course.) And my two-year old? She was perfectly happy to let me help frost and sprinkle a cookie with her, and then she spent the rest of the time picking off each sprinkle, licking the cookie clean, and then devouring the plain cookie.

eating cookies 2 isa eating cookie merry christmas
Have a wonderful weekend and enjoy some time with the ones you love!

Caramel Pumpkin Beignets

For those of you residing in the northern hemisphere, forgive my intrusion into your summery mindset, but here down south of the equator, even in Ecuador, we are feeling a little wintery. So, if you feel you can’t bring yourself to contemplate warm, cinnomony, crispy, fallish foods quite yet, just bookmark this post for later. But if you’re like me, and pumpkin is welcome in your desserts year round, here you go, a pumpkin recipe that is sure to delight. 

You see, every time I’ve visited my in-laws, without fail, my mother-in-law has at least one pumpkin resting on the counter, just waiting for me to do something with it. Pumpkin is the kind of thing that grows heartily down here, but most people are at a loss what to do with it. This third visit was no exception, and there was a freckly green gourd greeting me when we arrived from Galapagos. From the looks of things (dust collected) it had been there for a while, but it wasn’t until my mother-in-law casually mentioned that I should think of something to do with it, that I decided to give it a go. I carved it up, removed the seeds and skin, and steamed it until it was soft, and then pureed it until it was nice and smooth.


Now, having worked with fresh (versus canned) pumpkin a few times in my day, I knew that it would be a thinner and more runny than the stuff Libby’s has to offer. So, this time, I took the extra step of draining some of the extra water out by placing a napkin  over a fine mesh strainer (probably, several layers of cheesecloth would be ideal here) and poured the pumpkin into this to let some of the liquid seep out. I was happily surprised by the results, which were far nearer the thick pumpkin puree than what I had expected.

That was the easy part. The hard part was trying to decide what to do with all that pumpkin (at least 5 cups of it). So I went to work scouring the Internet until I came across some nice little recipes that met my needs and didn’t require buying additional ingredients.
The first was these lovely little fried things. The recipe called them beignets; they looked and tasted more like what I think of as fritters, but as I’m not from the south (and the person who wrote the recipe is, apparently) I would never presume to make a definitive statement about the proper terminology here. I’ll just say that they don’t contain yeast, so don’t expect them to be a pumpkin version of beignets a la Cafe du Monde (never been there, but I’ve seen enough copy-cat recipes around to assume that their beignets do contain yeast).


(have to say, I love the weird sea-creature shapes these turned into in the hot oil)

If you don’t want the too sweet, just dust them with some powdered sugar and call it good. But if you’re like me, you might as well go all the way and make up some super quick and easy salted caramel sauce. So, so good. I may have eaten two hot spoonfuls of the stuff before I even got to drizzling, so you’ve been warned.

Please, please be sure to eats these fresh and warm. They’re okay cold, but it just doesn’t compare to warm, gooey, caramel pumpkin goodness you get when they’re fresh out of the fryer. Enjoy!

In case you missed it, here are the recipes I used: Pumpkin Beignets and Salted Caramel Sauce.


Who Else Wants Caramel Chocolate Cream Cake?

Anyone? I know I couldn’t get enough of it (besides the fact that there were 25 other people trying to get enough of it, too). I was going to call it Frankencake (because it was patched together from several recipes). Very catchy. But I was worried that I would inadvertently be associating it with my least favorite of all holidays, so I decided to play it safe with the alliterative title instead.

I made it on a whim for my brother-in-law’s impromptu marriage celebration. As far as wedding cakes go, it was pretty make-shift, but for everyday cakes, it was amazing. Oh man, this cake was good.

Here’s what I did. I used the cake recipe for the best birthday cake from smitten kitchen, and the recipe for caramel sauce from the caramel cake, also from smitten kitchen (I think the  caramel sauce from this recipe would have been wonderful, too). I followed the directions for these respective recipes as is, except I had to fabricate my buttermilk (pour 1 tbs vinegar in a 1-cup measuring cup, then fill the cup the rest of the way with milk. Let it sit for 5 minutes, then stir; learned this from my dad) instead of using the real thing. I sliced the two cake rounds in half so I had fours rounds, then layered the caramel sauce an two rounds and topped them with the other two, so I ended up with two cake rounds again that each had a caramel filling. Then I made about 1 & 1/2 cups of fresh whipped cream, lightly sweetened with powdered sugar, and layered that in between the two cake rounds. I let this chill in the fridge till it was about time for it to be eaten. Then I made a quick chocolate ganache from Martha Steward (next time I would use 1/3 cup of cream, because it was a little too runny for my purposes with a half cup) and dumped it over the top.

If you have any excuse to make this cake, go for it. You won’t be disappointed.

Beautiful Food: Pan de Yuca y Yogur

The afternoon I arrived in Ecuador for the first time, we loaded our 4 large suitcases into a taxi van, usually employed as a school bus of sorts, and head into the bustling city of Guayaquil. The first place we stopped was a little shop selling these little golden bites of heaven and frosty fruity glasses of yogur. It was the first thing that I tasted in Ecuador, and one of the foods I still dream about now that I’m home (that and ceviche).

Well, a while back I found a lovely website with recipes for lost of Ecuadorian classics, including this yummy little bread. I tried it, using tapioca starch since I couldn’t find anything labeled yuca flour, and it was very good (what do you expect with a bread that is 60% cheese?) and surprisingly similar to the original. But without that tall cold glass of yogur beside it, it just wasn’t the same. After putting it off for years, I decided to attempt the drink, which is something like a smoothie with yogurt in it.

I wish I had tried this stuff sooner, because it is so good! There’s probably lots of recipes out there for something like this, but I just improvised:

  • 1 ice-cube tray full of frozen (homemade) plain yogurt
  • 2-4 tablespoons frozen juice concentrate
  • 1-2 cups fresh or frozen fruit (if you use frozen, your yogur will be thicker)

Blend it all up in a blender and serve with some warm pan de yuca.

I’m linking this up at skip to my lou

Playdough

We made play dough today.

I used the recipe I found here, and I thought it was pretty easy, and the texture is nice and soft but not sticky.

Next time I might try a half recipe, because it made a lot, so I thought, oh, I’ll make three colors. Which very shortly turned into one multi colored lump.

Next time, just one color.

**UPDATE: Here’s the recipe I used for the play dough. It was nice and smooth, and not sticky at all.

A Little Bit of Foolishness in the Kitchen, and Some Other Tidbits

Well, after this post, you may be surprised to hear that I gave caramel making another go. Well, another two “go”s, actually, since as you may have guessed, my second attempt didn’t go much better than the first. But first, there’s a little back story behind my second attempt at candy making.

You see, I’ve had these pinned on my “things to eat” Pinterest board for a while, and since I had some caramel-making ingredients left over from a birthday cake, I decided now was the perfect time. Twix are one of my favorite candy bars, and I figured, if I can make them myself, why not?

So I tried to make some caramel Saturday night, but it took a long time for the mixture to get hot enough, so I started nursing (that eternal occupation) while I was waiting, and just checked it every now and then. Well, apparently the temperature increases rapidly the last 15 degrees, so I overshot my desired consistency and ended up with something more like those butterscotch lollypops (they’re spelling, in case you’re looking at the word funny) you can buy at See’s. Have you tried those before? They’re delicious, and my caramels turned out pretty close in flavor and consistency. If you want to know, I used this recipe and just cooked it until it was a dark caramel brown (just a little over 250 degrees Fahrenheit); make sure to cut them when they’re still warm, because they harden up quickly.

Delicious though they were, this caramel was not appropriate for the twix recipe. I wanted something a little softer. So I tried again the next day with a different caramel recipe, another pretzel-dipping caramel. This one was way different, yummy and softer, but still a little to firm to really mimmick the candy bar I was going for. At this point I thought it was best to just go with it, though, because I would be risking my health to attempt three caramel batches in one weekend.

In the end, I made a jar of butterscotch caramels, two jars of caramel-chocolate dipped pretzels, chocolate covered almond-caramel clusters, and a jar of twix-like chocolates.

Sure, I got a little carried away, but I guess it’s okay every once in a while.

While I’ve been busy in the kitchen, I’ve also been working on a bunch of little projects here and there. I have one project that I’ve been working on for nearly a year that I’m hoping (cross my fingers) to be able to show you later this week. And a started a new project last week that I’m really excited about. Here’s a sneak peek:

Any guesses? Hopefully I’ll have more to show you this week.

Willy Wonka I Ain’t*

*Sorry if my incorrect grammar in the title has offended anyone. As a professional editor, I know emotions over the word “ain’t” can run high. I hope you don’t hold it against me.

I usually don’t do much to celebrate Valentines Day. It’s not that I’m bitter about anything, or hate all the gushy love stuff, I’m just not that into it for some reason. A few chocolate kisses and a few real ones from my handsome husband is enough V-day recognition for me. But last night I decided I wanted to make some special treats to send to my brother in New Jersey for Valentines day (yes I realize that said treats will not make it halfway across the country today, but it’s the thought that counts, right?). He’s almost done with his LDS mission, so I thought I’d send one more package before he comes home.

I decided to go with caramel-and-chocolate-covered pretzels, mostly because I wanted them (that’s usually the driving force behind any treat-making in my house). Well, as it was a Sunday evening and I had no bag of individually wrapped caramels lying around, I decided to make my own caramel. I’ve made caramel popcorn and caramel sauce, so I thought making caramel for dipping the pretzels would not be that hard. Yeah, I was wrong. Here’s what my note to my brother is going to say:

“Dear Justin,
I hope you like the pretzels. I burned my finger and made myself and my kitchen into a candy-coated mess, so even if they are mashed and broken and you have to scrape them out of the bag to eat them and they’re a little stale by the time they get to you, please pretend that you like them.
Love, your sister”

Yup, it was kind of a mini disaster. Besides the above-mentioned problems, I was also not patient enough to let the caramel reach the right temperature, so whatever magical chemistry that needs to happen to make the caramel get hard did not happen. As a result, the pretzels were really sticky, even after I put them in the fridge overnight. (Does anyone have any caramel making tips to help with this?) Then, when I went to dip them in the chocolate, the caramel started melting off, and pretty soon I had a bowl of caramel-chocolate goop the was all grainy and not pretty.

I only did half the pretzels with the dipping method before I realized it just really wouldn’t work. So instead I laid each pretzel in a little puddle of chocolate and drizzled the tops with melted chocolate.

I drizzled the dipped ones, too, to cover up the ugliness. It worked pretty well, I guess, but not exactly what I was going for. Oh well, I guess I’ll have to try again next year.

Here are the ones I’m sending:

and here are the ones I’m not:


I kept a couple good ones for myself and my honey, of course. It is Valentines Day, after all.

Hope your day has a little sticky gooey goodness, too. Happy Valentines Day!