Out of the blue

So, I don’t know how to begin, since it’s been so long. The short story is that life with three little girls is busy. I found myself making things, and reaching for my camera less and less to document it, and I realized I was okay with that. Sorry. I really have been making things all this time, but I’ve just kept it in the background. But here’s some proof that my creative juices haven’t completely dried up:

IMG_7991

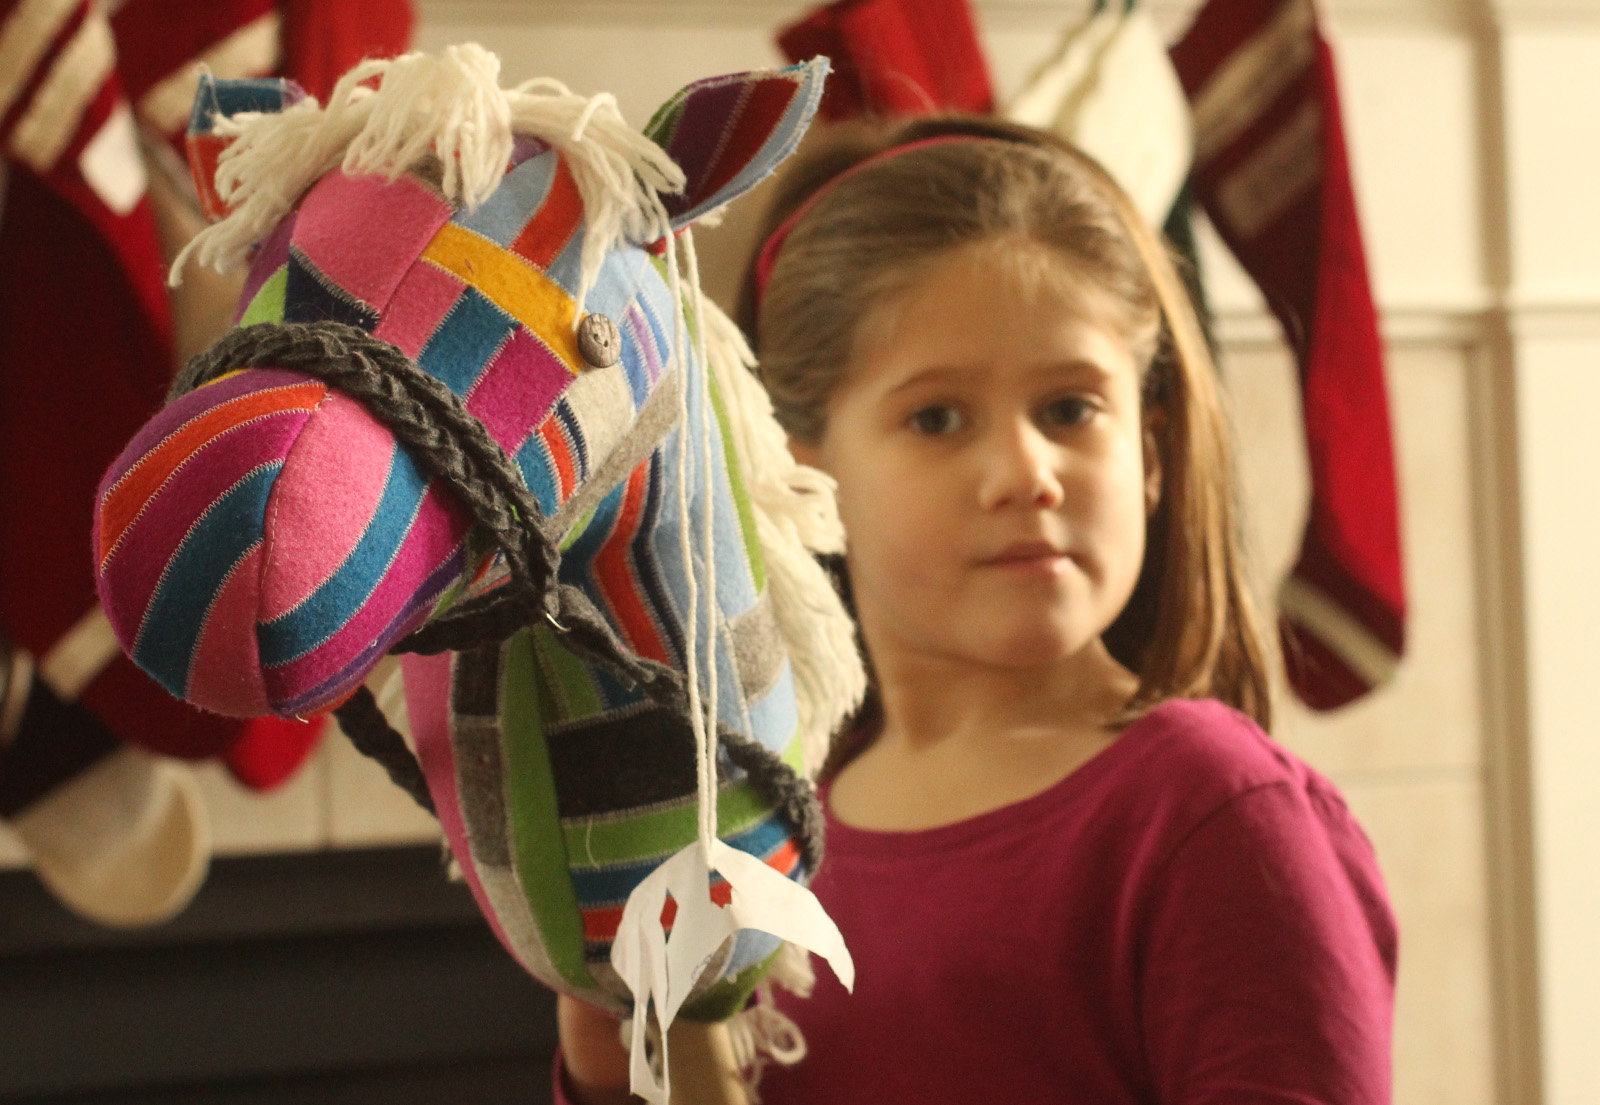
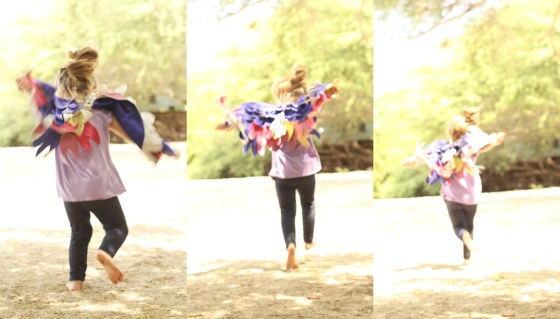
Her This is on e of name is Lola Sapphire (or Sapphire Lola, or just “ose, ose, ose,” depending on which of my three girls you are asking).IMG_7996This is not one of those projects that I had planned for a while. Well, honestly, I did have it planned for a little while. Okay, so I may have already made a failed version of this giant rideable horse for Christmas, and well, it was a flop, literally. No under structure meant that it literally collapsed under the weight of its own stuffing. Which was okay, because it made a handy huge floor pillow, until the cheapy felt (apparently not all 100% wool is created equal) started  to pull apart. From there it was all down hill. I was fine with letting it go as a learning experience and moving on. IMG_8005Then I saw this gorilla by this amazing soft sculpture artist, and I was sure I had to try again. IMG_8016

So I did. And that one was a total failure too. Collapsed under its own weight, even with an structure inside it. But I was sure I could make it work, and take number three was a hit. IMG_8033 Of course, I didn’t want it to be too easy, so I only got myself one yard of fabric to sew the whole thing. Haha, that was fun. The biggest scraps I have left are no bigger than 2″ squares.

IMG_8036

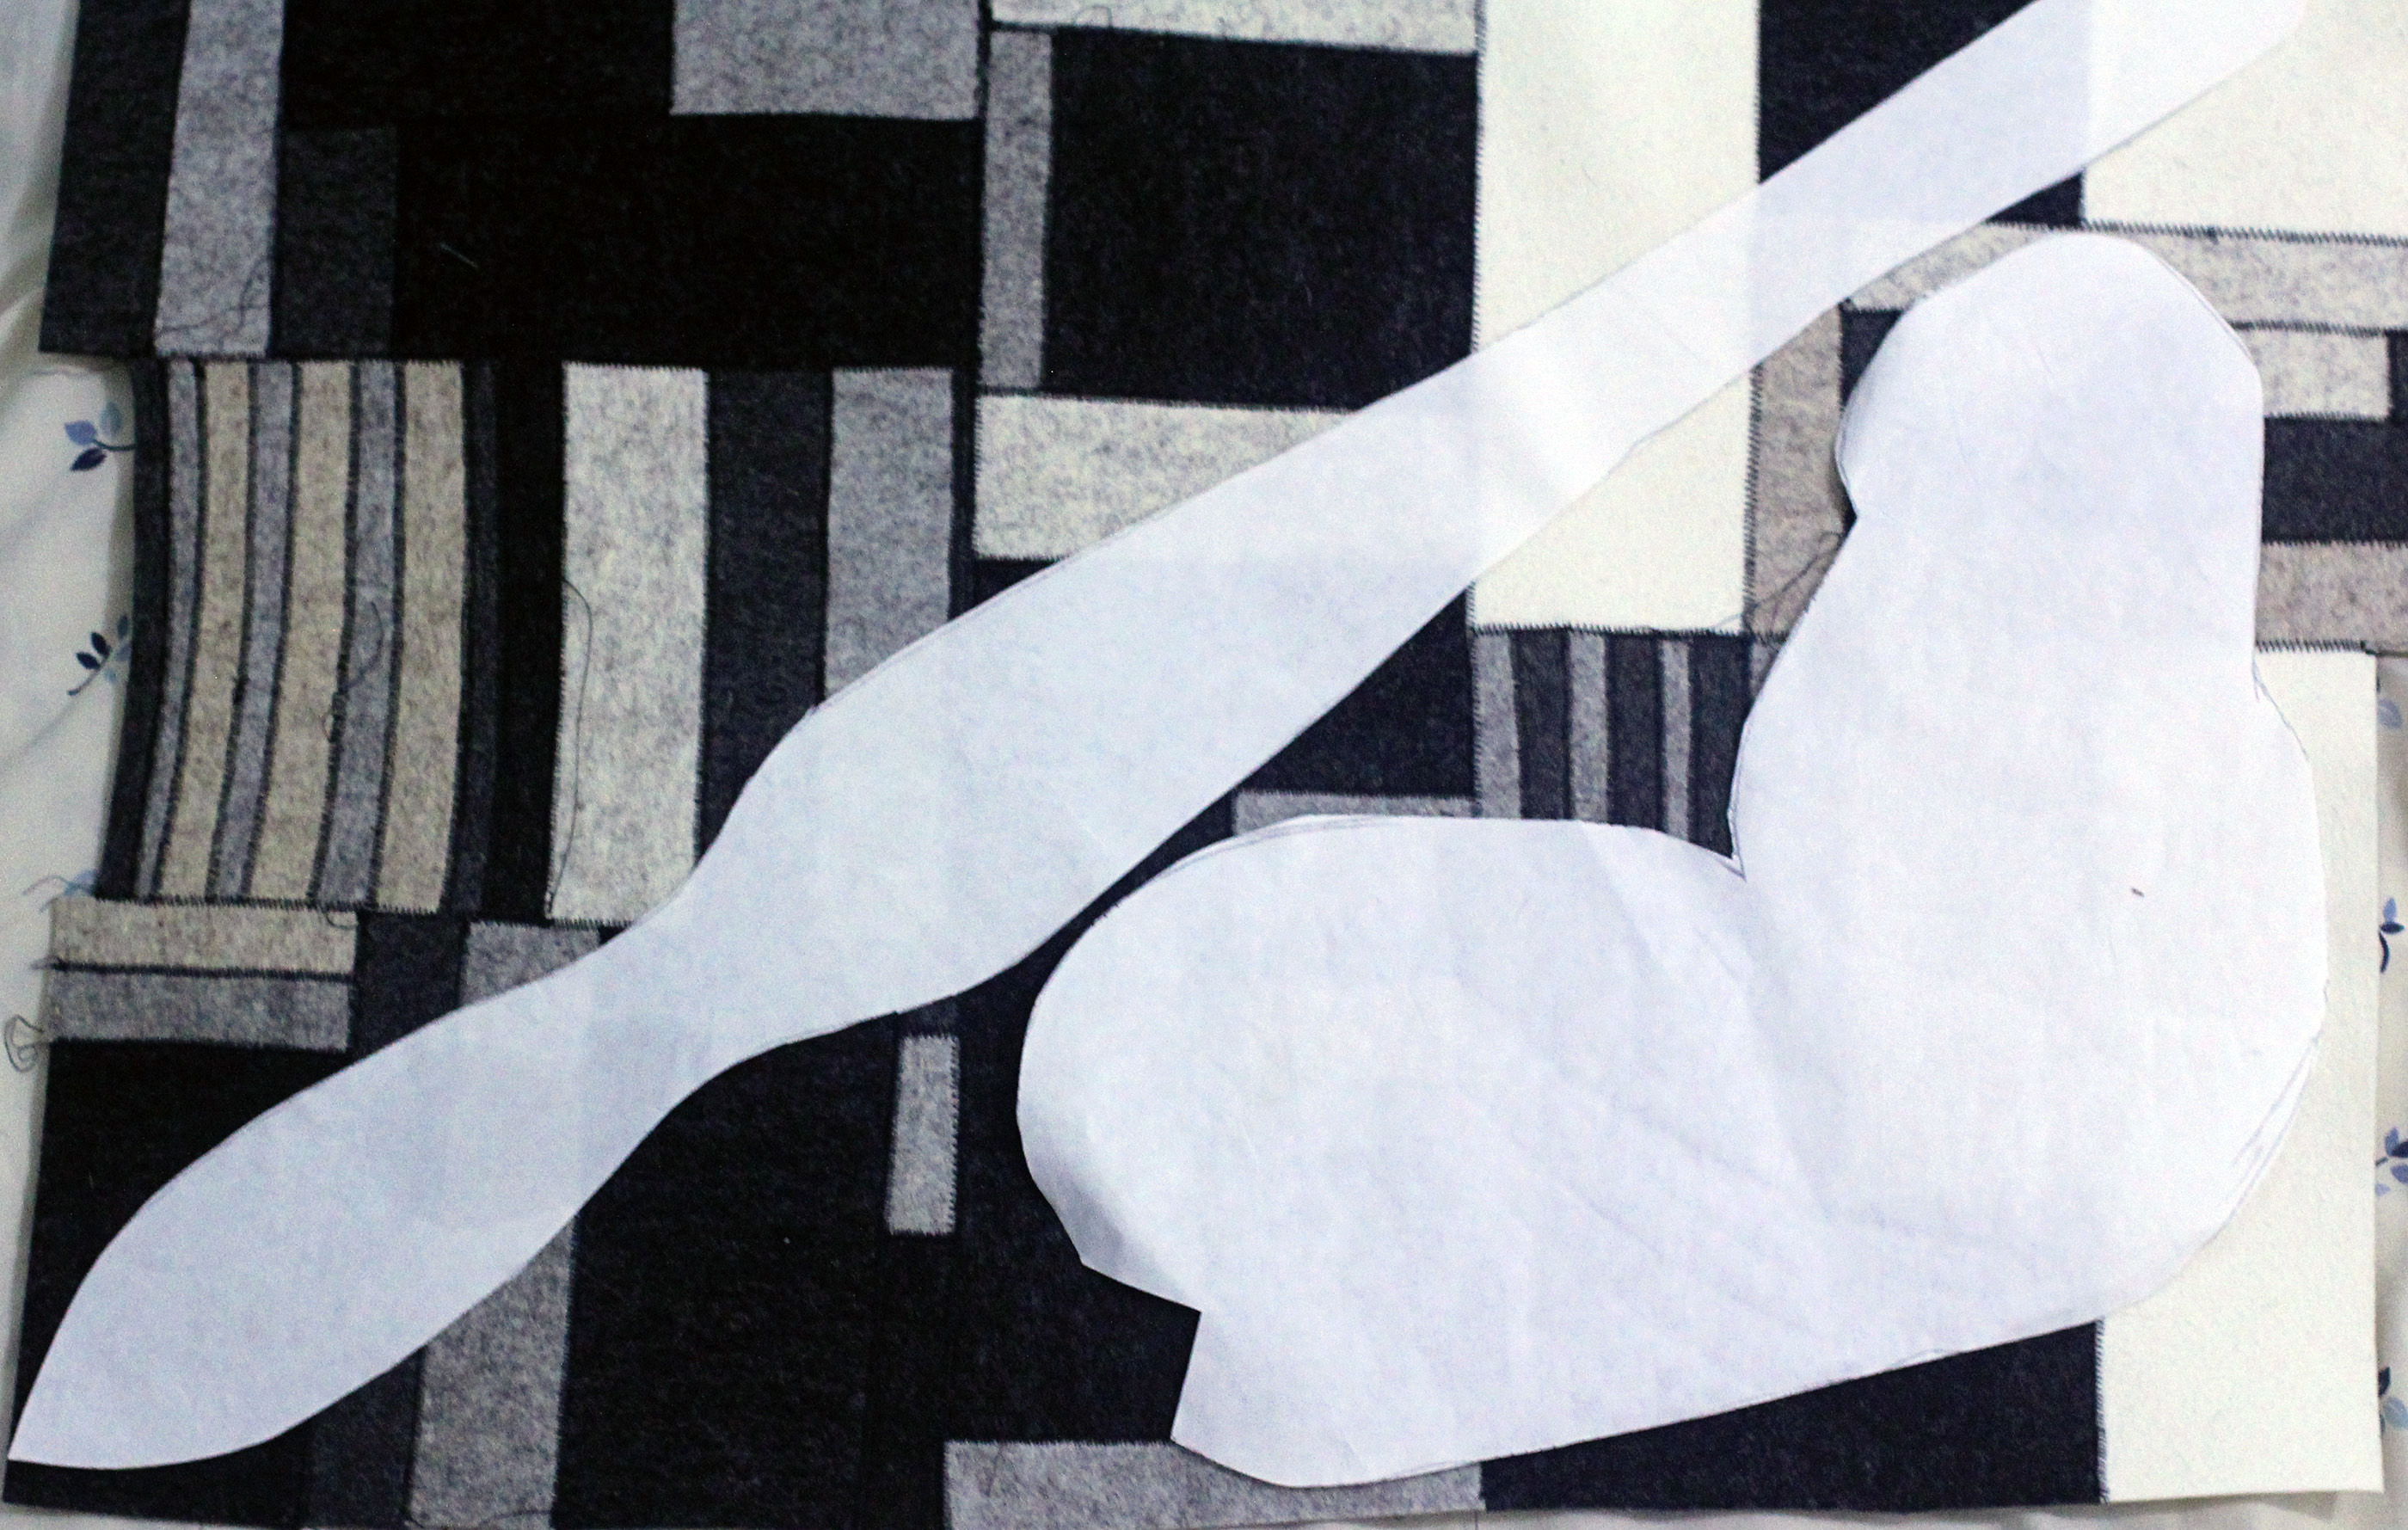
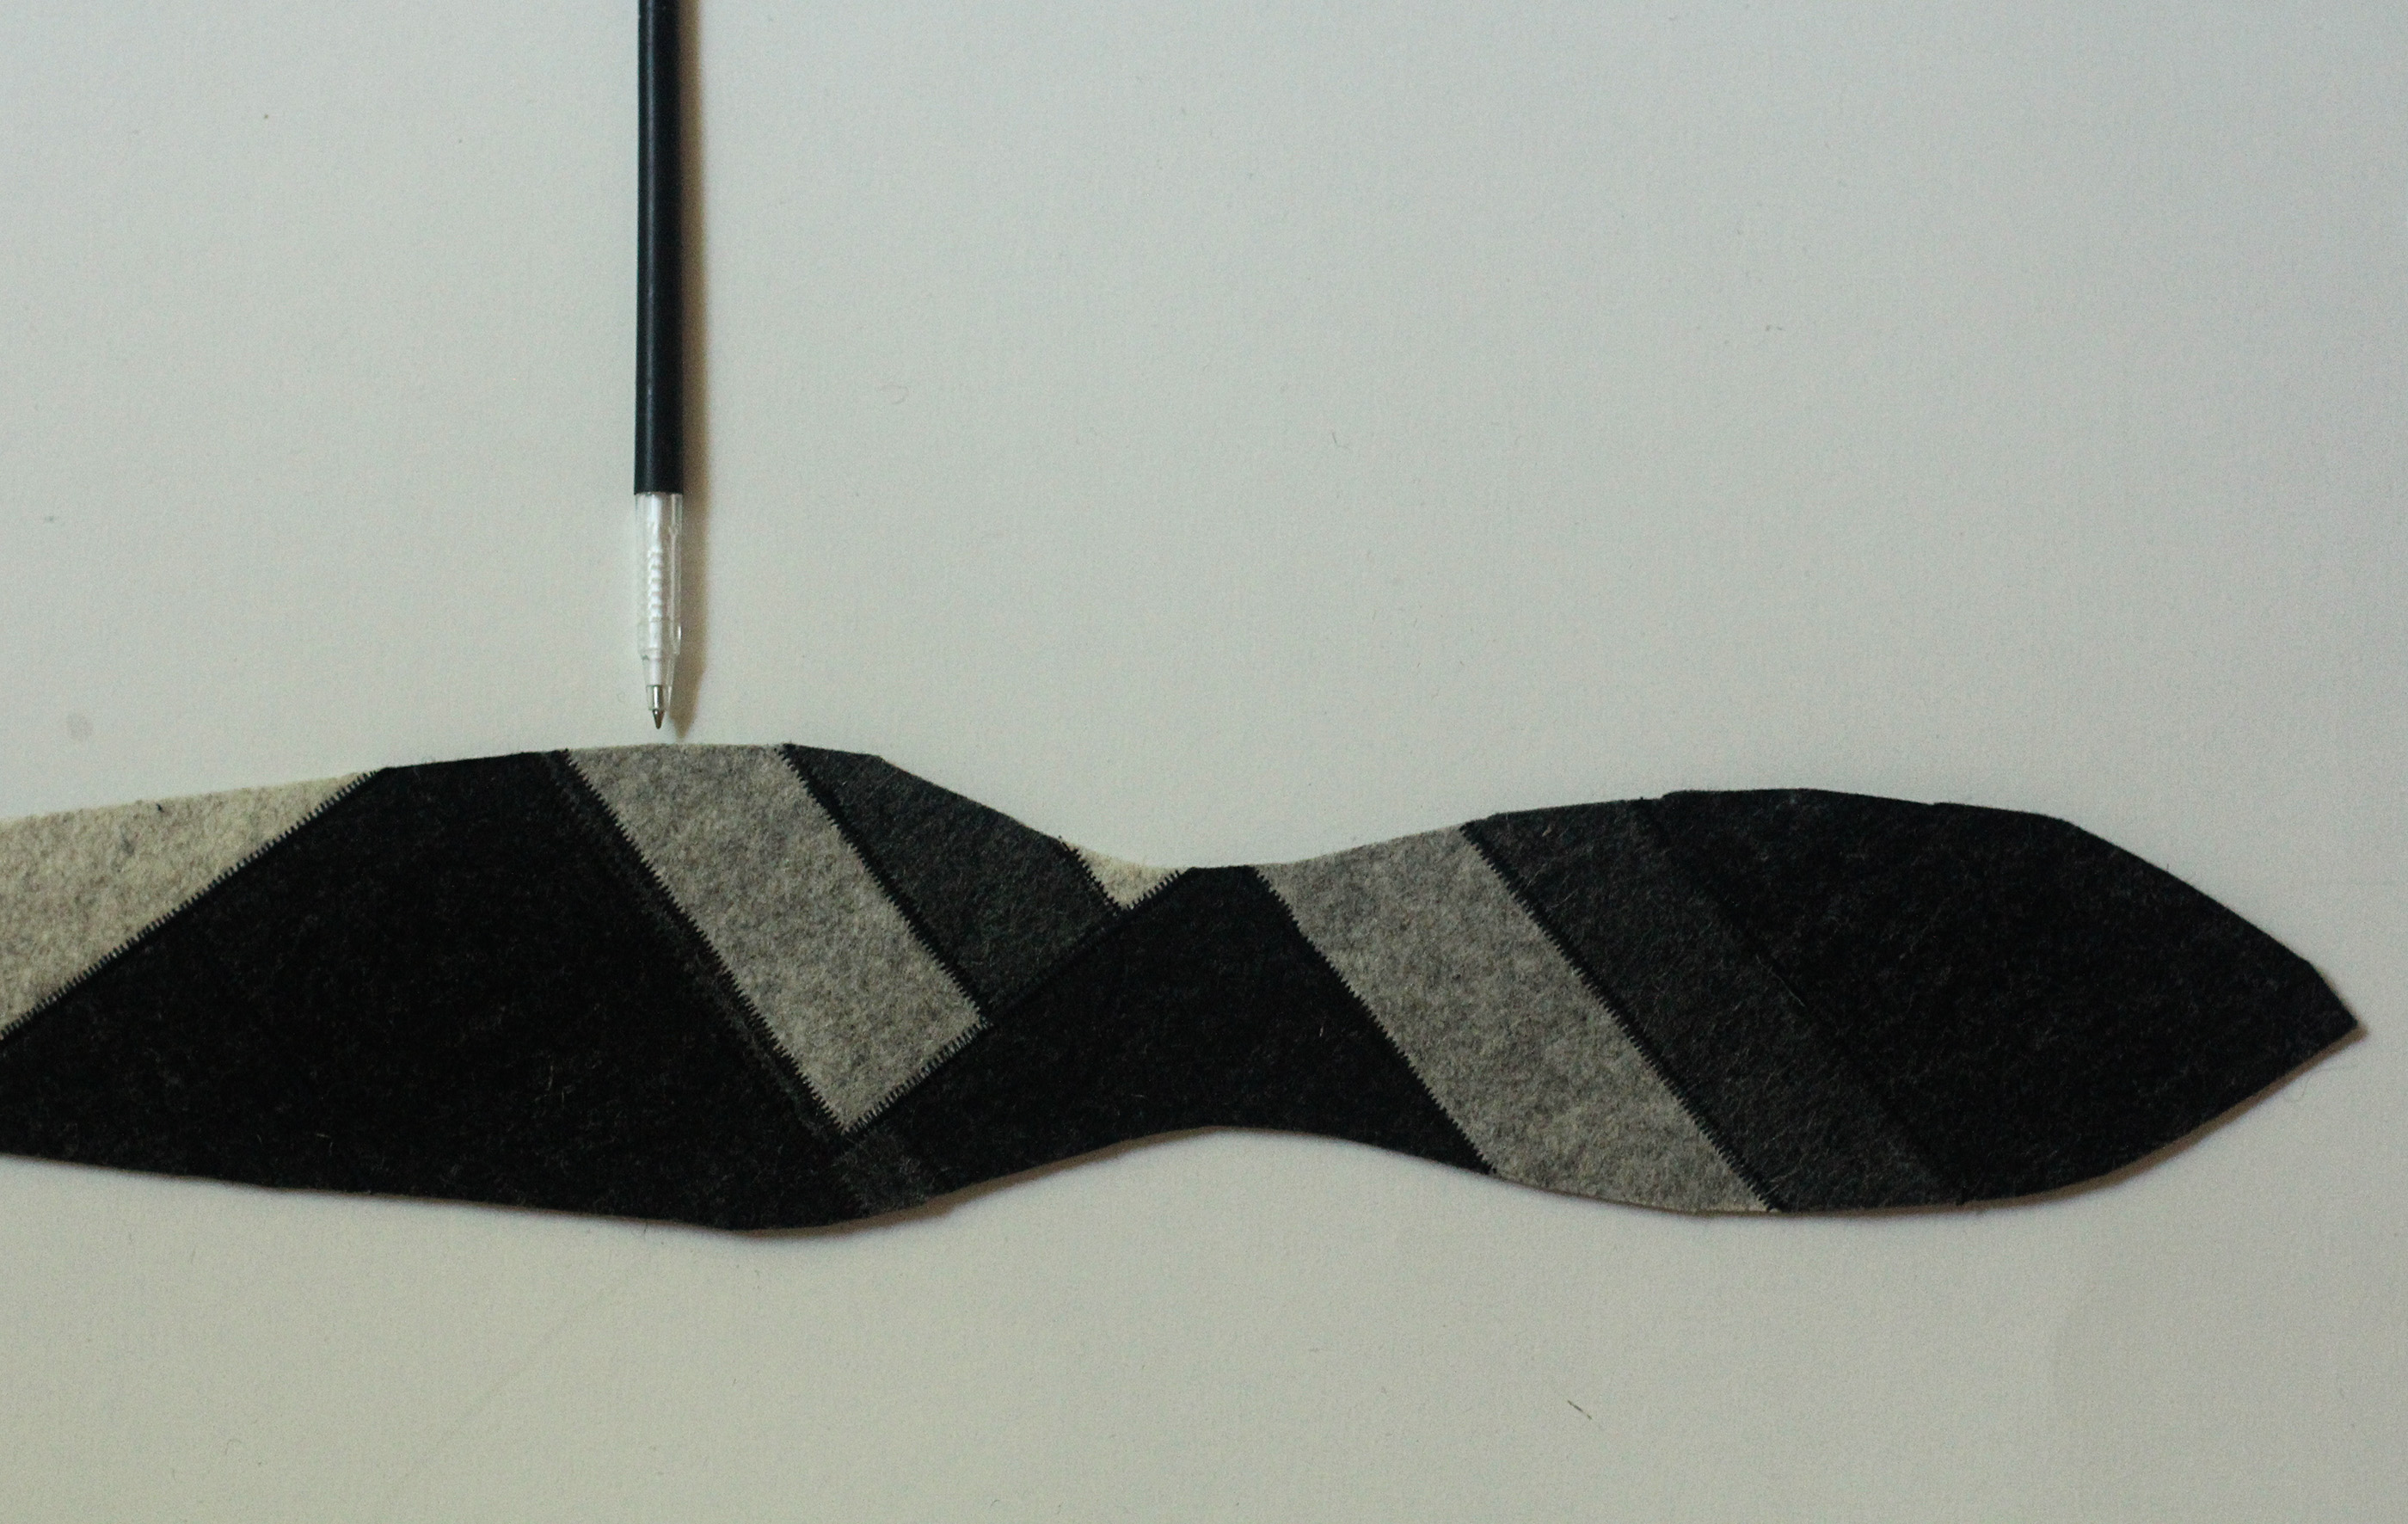
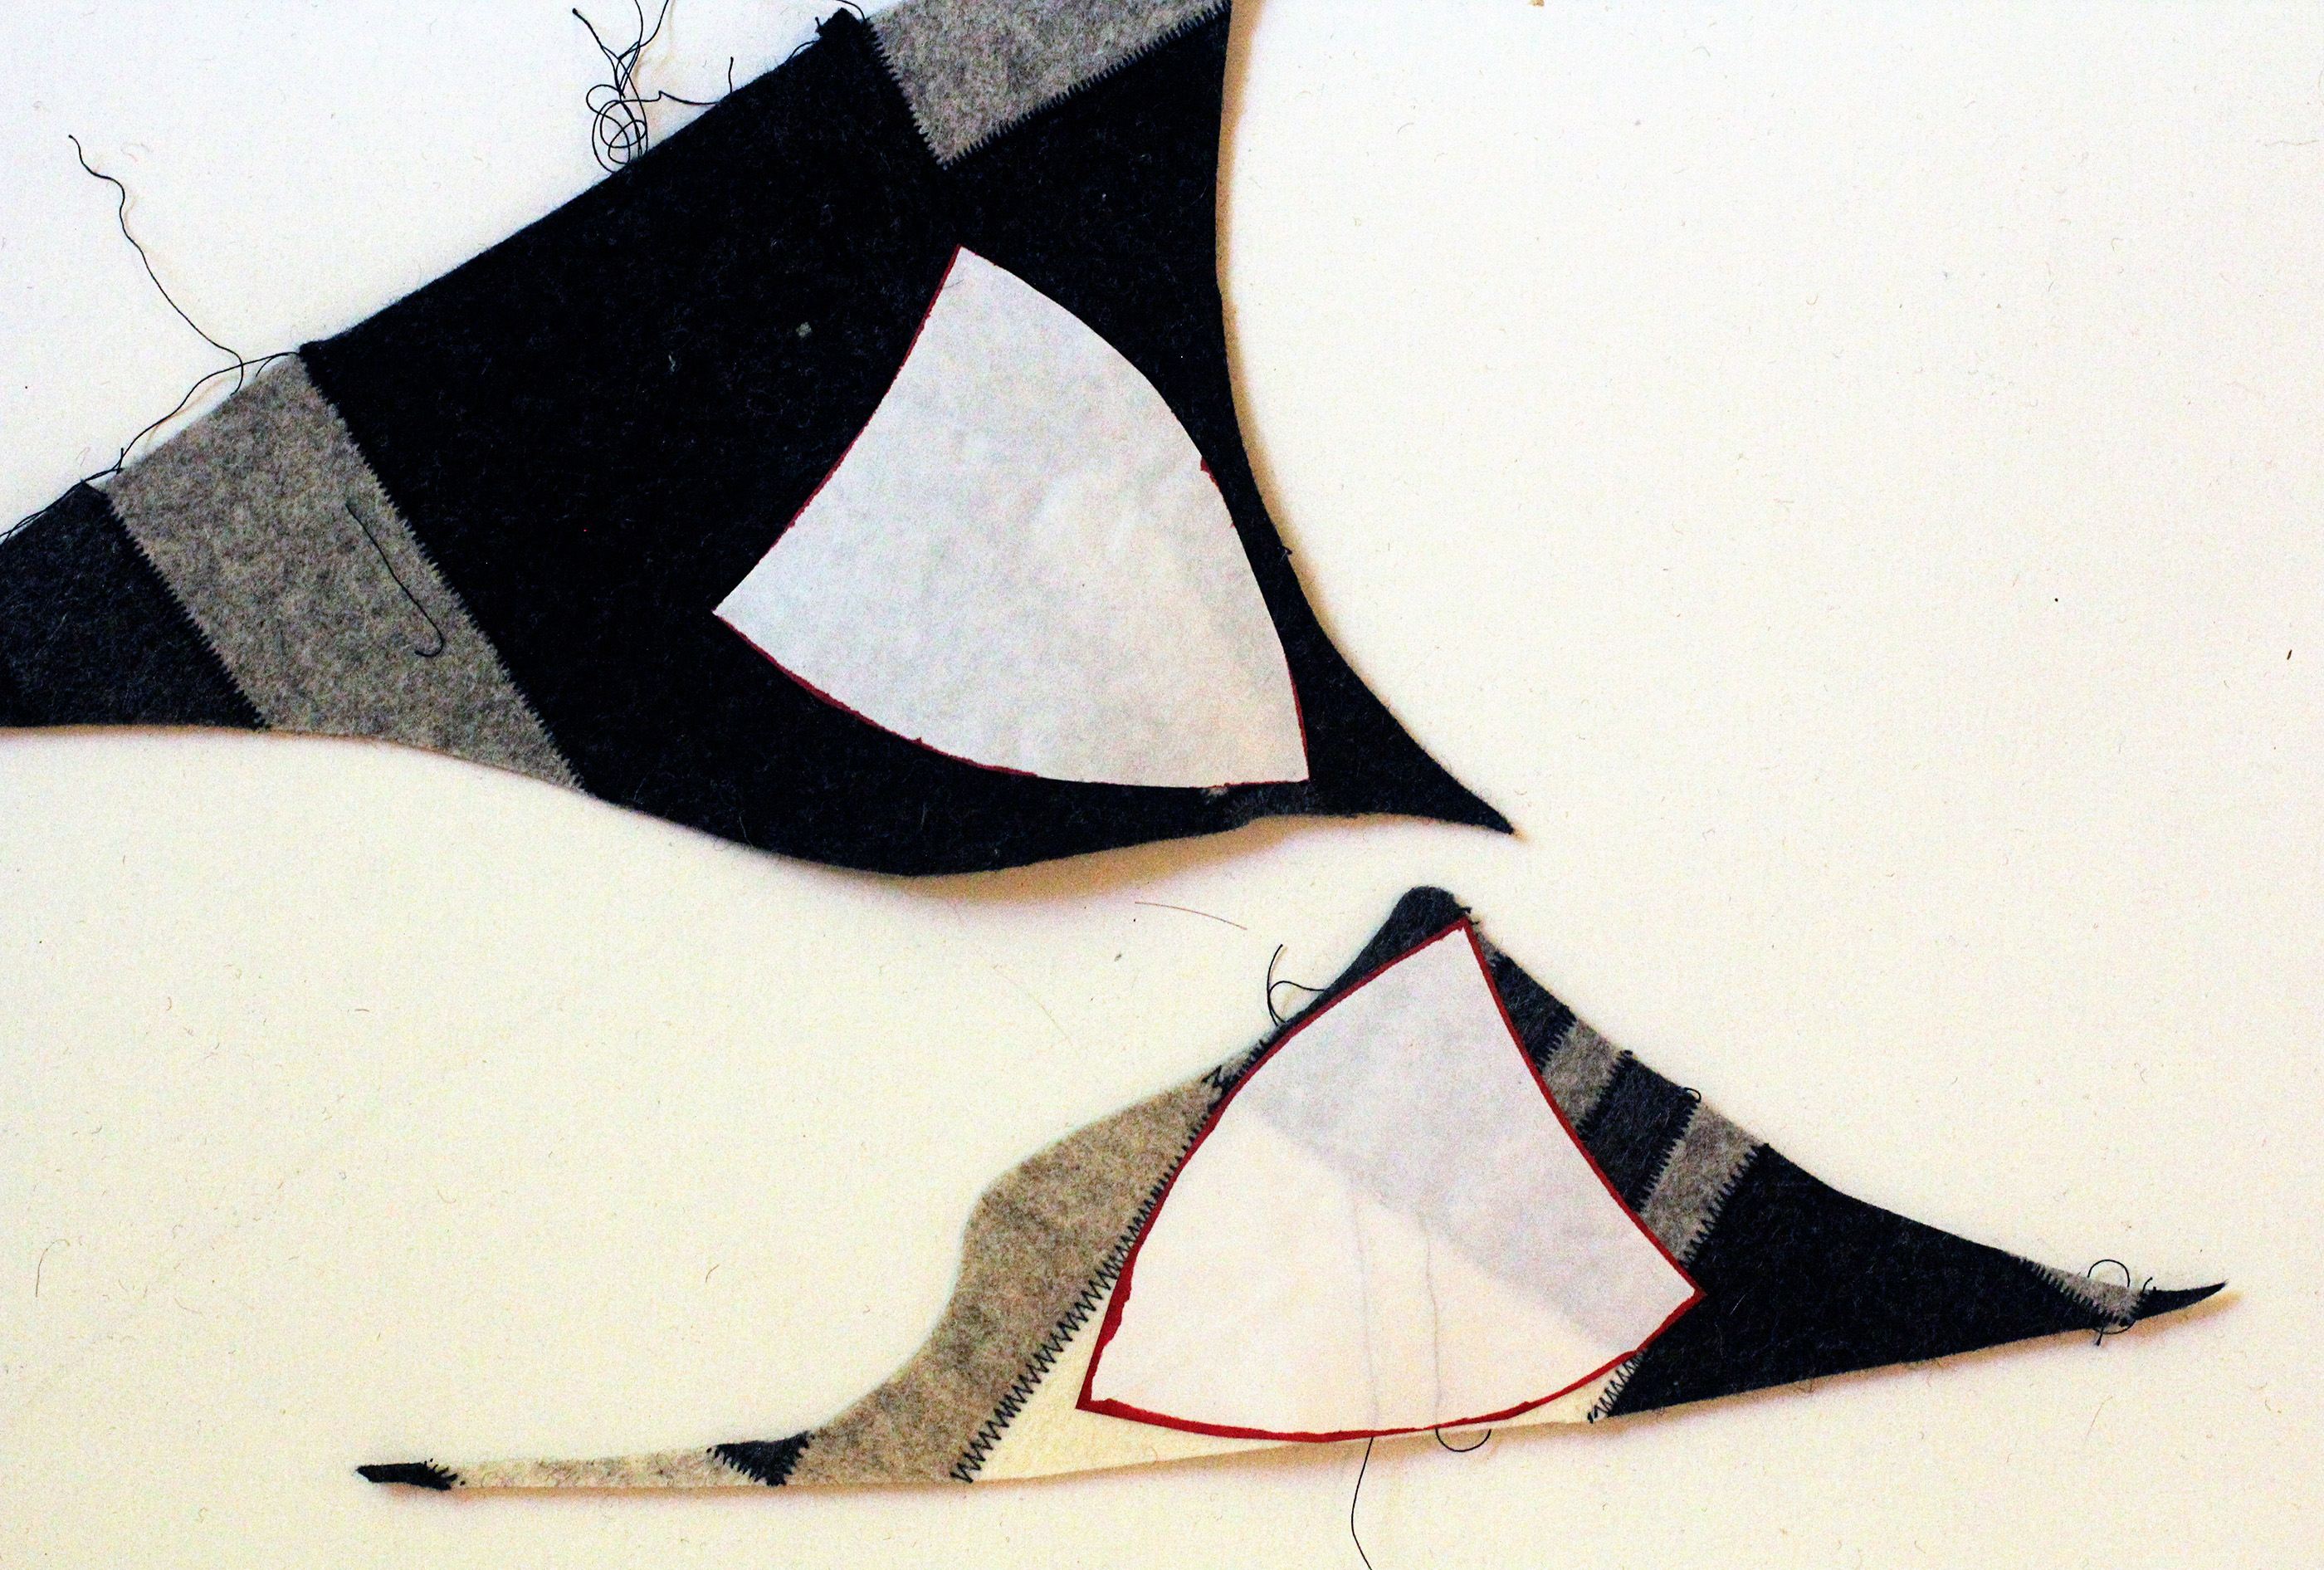
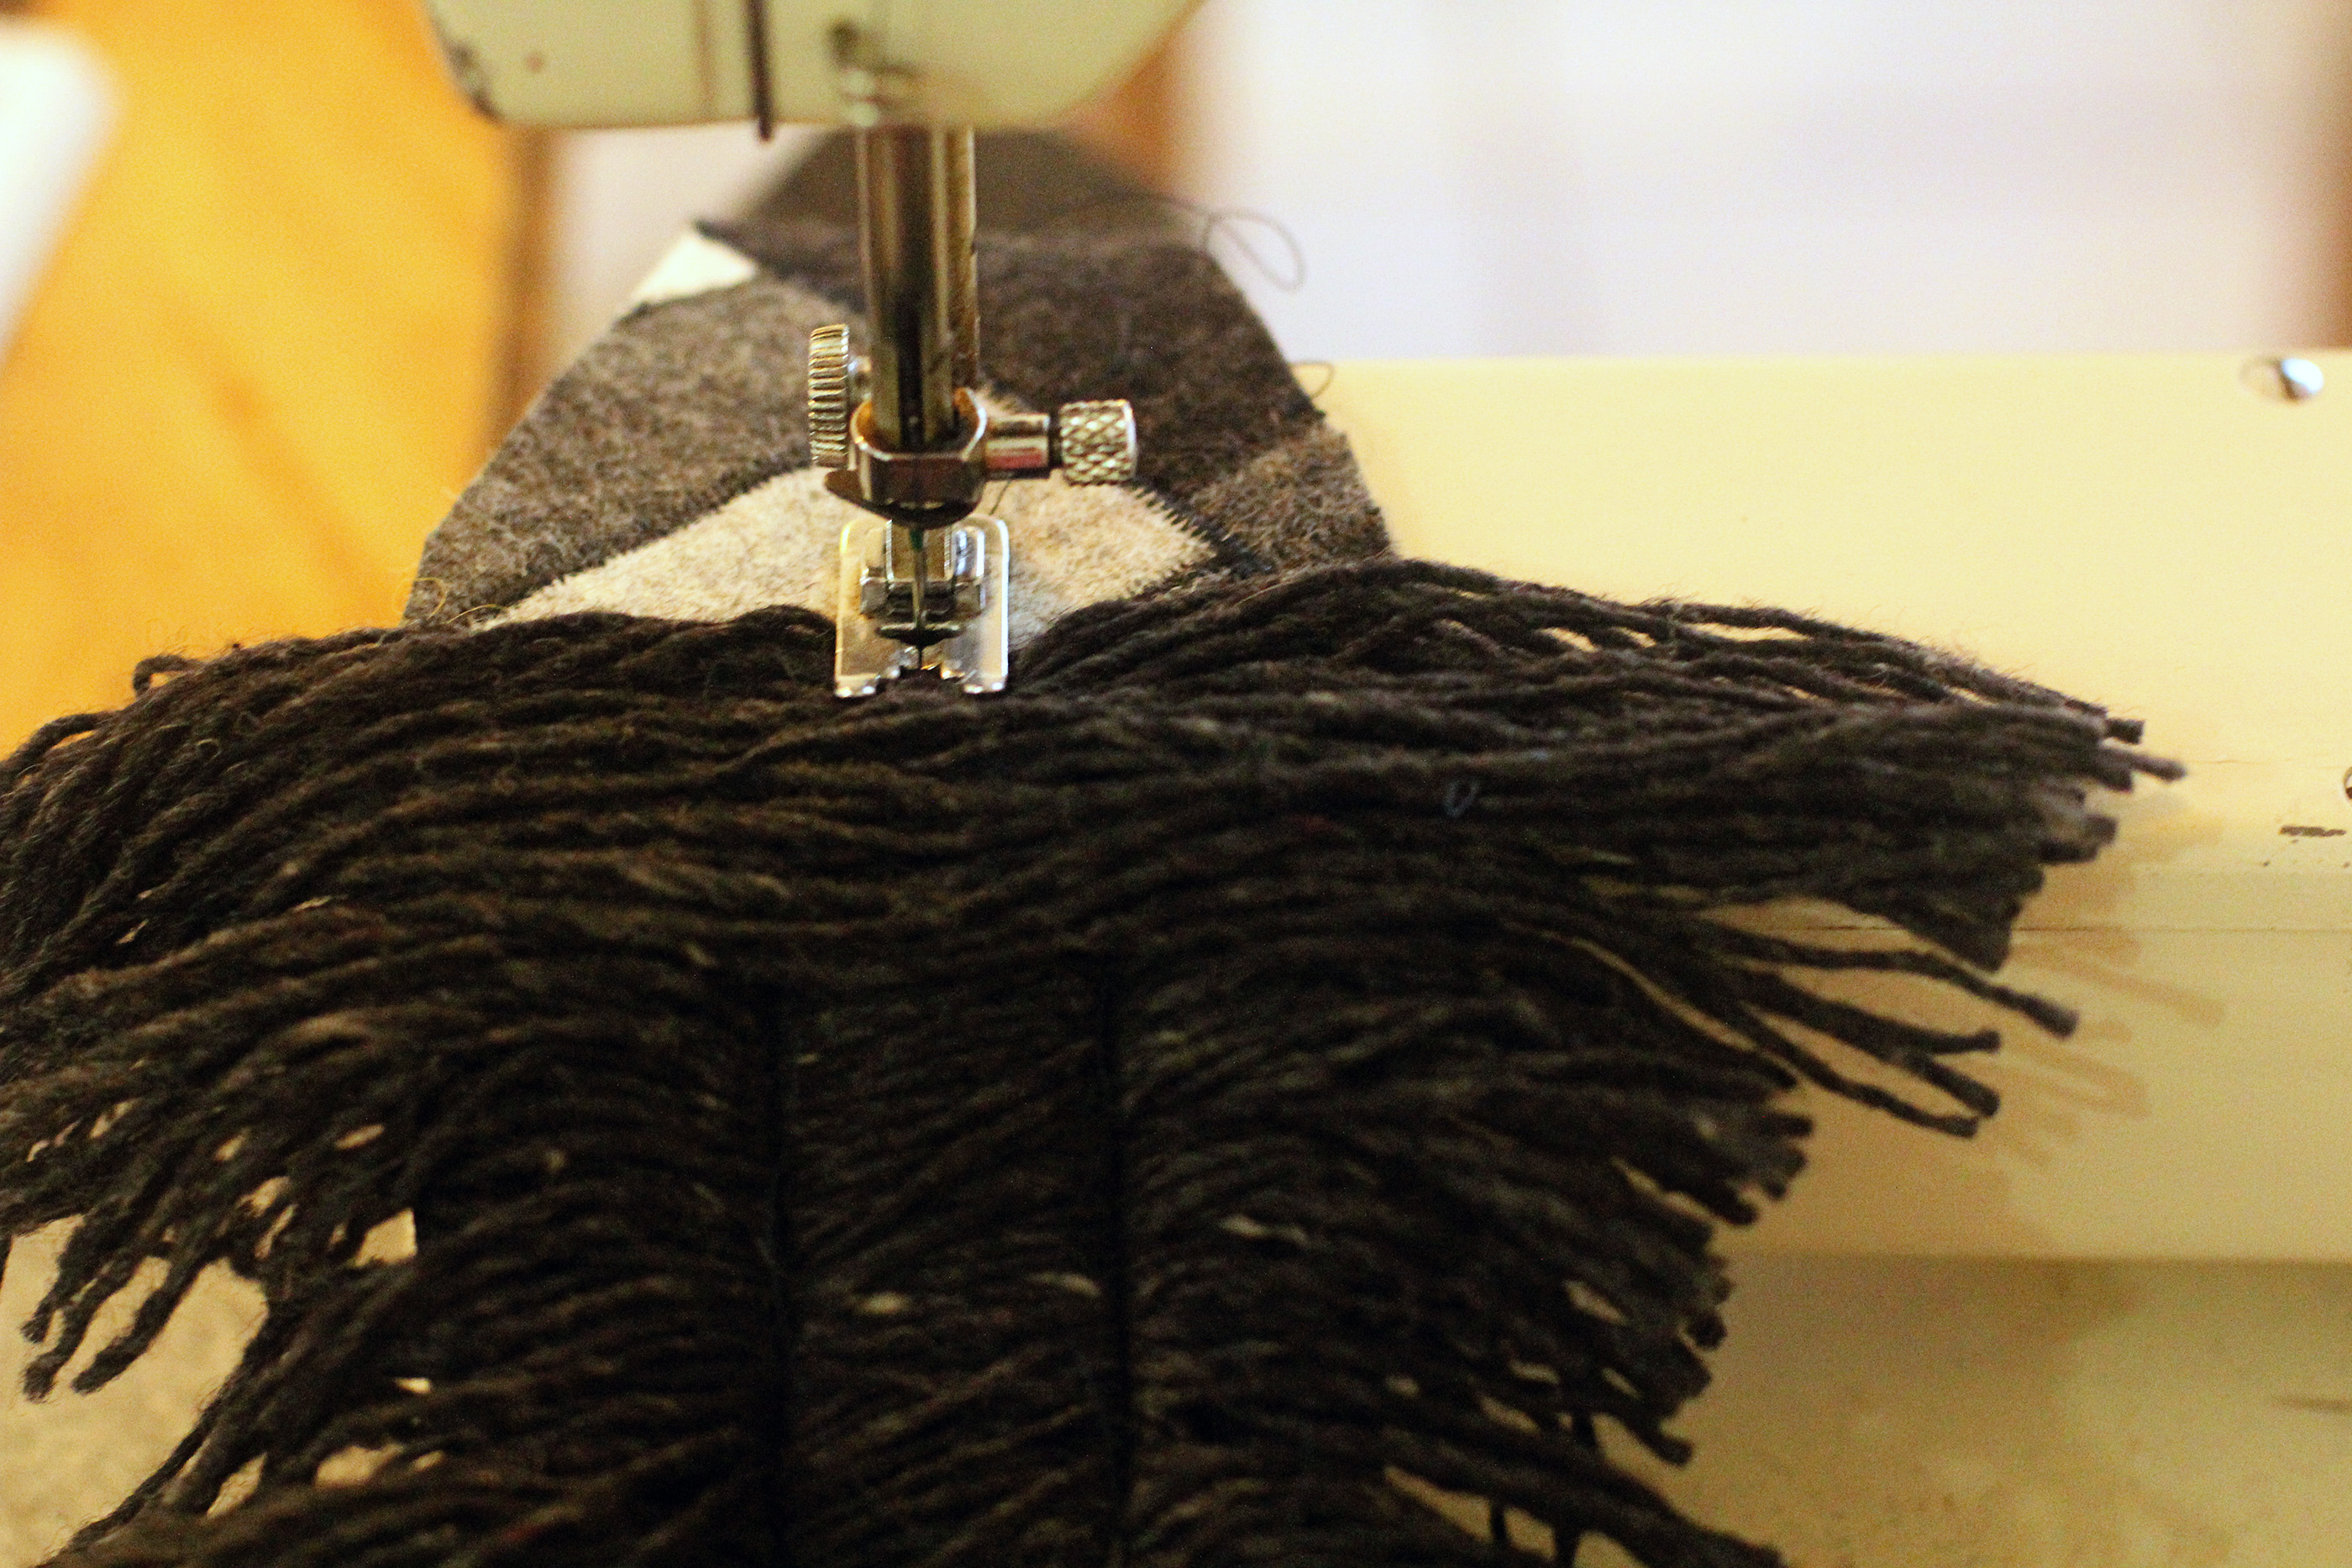
The whole thing is stitched by hand. It’s stuffed with about 10 lbs of of wooly worms.
IMG_8039

Maybe there will be a 4th try, since the head of this horse, no matter what I tried, kept turning out like a cow instead of a horse.
IMG_8056 But for now, we’re all pretty happy with Lola right now. IMG_8070 IMG_8077

This is my favorite yarn for hair. It’s Nature’s Choice organic cotton. So soft and lovely. IMG_8085This is my entry for the #6WeeksofSofties contest at Sew Mama Sew. Thanks to them for the inspiration and challenge to make this project right!


Felt Hobby Horse

IMG_6430So, I am here. Really. I’ve just been taking a loooong off-screen break. I guess I just needed it. But with the new year, naturally I thought I might be a good time for a blog reboot. A just over year ago I was frantically packing my bags down to the last ounce to prepare to head back to Galapagos.

But this year, I have no immediate travel plans. In fact, we might not board  flight the whole year. But that’s okay. We’ve entered a new phase of our lives as a family of five, and we’re settling into it, for the next little while, at least. Anyways, enough talk. Here is a project that I started a year ago, and I’ve just now finished it up. Some scrappy felt hobby horses. IMG_6426 IMG_6400 IMG_6411 IMG_6416 IMG_6419 IMG_6422 IMG_6426Oh, you say you’ve seen this before? Well, you have. But, in case you were interested in making your own, I made a second one (well, I had to anyways, because I pretty much have to make two of everything these days; luckily sweet girl number three hasn’t demanded too much crafting from me yet) and decided to make a tutorial for you guys. 

(Just so you know, it took much longer than I expected it would to put this tutorial together, and I’m sorry if there are any errors; pattern-making isn’t my forte.)

Here we go.

Materials:

  • Felt scraps (a whole lot, in squarish shapes, are best; of course, you can always use whole pieces of felt or really any material you’ll want) You’ll need enough to make approximately a 2-foot square piece of material to cut your pattern pieces out of.
  • Stuffing (I prefer wool for quality reasons, but whatever you want is fine)
  • Thread (you’ll want some heavy-duty stuff, especially for hand stitching on the eyes, ears, and finishing the closure)
  • Buttons for the eyes
  • A 1-inch thick dowel, about 3 to 5 feet long, depending on how tall you want your horse to be.
  • Yarn in a coordinating color
  • Freezer paper (for tracing your pattern, it’s my favorite way to cut out felt)

Tools:

  • Scissors and/or rotary cutter
  • Sewing machine
  • Cutting mat
  • Iron
  • Stiff cardboard or a book, about 5 inches wide and 8 inches long.

Make your scrappy piece of felt (if you are using a solid piece of fabric or felt, you can skip this part)

  1. Basically, you will be butting up two pieces of felt together and zigzagging over both sides so that the two pieces become one. (See this post for a better explanation)
  2. As you go along, continue building up your scrappy piece with more pieces. I like to make several scrappy blocks and then sewing this big blocks to each other to make your big piece of fabric.

IMG_3149 Cut out your pieces.

  1. Print the template. Click on these links for the four pages of the template: gusset gusset 2 horse neck 1 horse neck 2
  2. You’ll need to choose “print” under the tools menu. I am not a professional pattern maker, so these may look a little rough, but hey, it’s a free tutorial.
  3. Cut out you’re pieces and assemble the ones that are in segments.
  4. Then, you’ll want to trace your pattern pieces onto freezer paper (ignore the big notch in the horse’s head down in that picture, I was just using a scrap of freezer paper and it didn’t all fit). The long gusset piece is a little extra long to give you some wiggle room when finishing off the opening for the stick, so just keep that in mind.
  5. Arrange your pieces on your felt. I only drew out one horses head, and cut two the same way, since there is not “wrong” side to my felt piece, I could just flip the cut piece and it was fine. If you are using material with a right and wrong side, make sure to do a reverse side of the horses head, too. When arranging your pieces, try to leave about 1/2-inch in between the pieces for your seam allowances.
  6. Once you like the arrangement, iron one of your freezer paper pieces down to the felt.IMG_3164
  7. Baste stitch all the way around your first piece. This is  your way of transferring your pattern to your fabric.
  8. Cut out your first piece, leaving a 3/8ths inch margin around your basting for seam allowance. You don’t need to be too careful about getting perfect seam allowances; you will use the basting to guide your final stitching, not the seam allowances. The gusset piece includes the seam allowance, so just skip the basting and cut right along the pattern piece. IMG_3175
  9. Continue this process of iron-baste-cut for your other pieces.

Now for the mane.

  1. Wrap your yarn around some stiff card board, or a book. It should be about 5 inches wide and at least 7 inches long.
  2. Wrap it a lot, but if you find you still need more yarn for your mane, you can always wrap more, so don’t worry about it too much. IMG_3178
  3. Now cut the yarn along to top. IMG_3184
  4. Then cut along the bottom. This will give you a bunch of yarn approximately the same length for the mane.IMG_3186
  5. This picture is to show you about where on your gusset piece to start sewing the mane.IMG_3195
  6. Now sew the yarn down. Start with about an inch bunch of yarn. IMG_3200
  7. Using a small stitch length, start sewing the yarn, about 3/4ths of an inch in from the edge of the gusset. Continue to add more yarn, a couple inches at a time, and sew all the way down till about 4 inches from the bottom of the gusset piece. You’ll want to use about 2/3rds of your cut yarn for this. IMG_3206
  8. Then sew down the other side of the gusset over the yarn, about 3/4ths inch from the left side. IMG_3209
  9. Now finish by sewing 1-inch bunches of yarn right down the middle of the gusset.IMG_3213
  10. When you are done sewing, it will look like this:IMG_3217
  11. Yes, not very mane-like, but never fear. Just start to mess it up with your fingers, and hey-presto, you’ve got a nice full mane going on. IMG_3223

Sew your horse head together.

  1. Okay, here’s where I apologize for the lack of great explanation and pictures for this step. But hey, it’s a free tutorial, so you get what you pay for, right? (nervous laugh) Generally, you are going to sew all the pieces together, right sides together, leaving the bottom of the neck open, and then turn the whole thing out. This is how I did it. I pinned the one side of the horse’s head  to the gusset. The pointy part of the gusset will sit about where the little notch is at the bottom of the mouth, and the rest just follows along the top part of the horses head. Make sure when you pin, that you have the side piece facing up, because you will want to sew along your basting stitch. Also, make sure you have all the yarn from the mane tucked out of the way where you are going to be stitching.
  2. Sew from the tip of the gusset to the bottom of the horse’s head, but don’t sew all the way to the end of the gusset piece. Try to follow your basting line as close as possible. IMG_3228
  3. Now line up the other head side so that it is in about the same position as the sewn side of the head, in relation to the gusset piece, pin, and sew. (Again, follow the basting stitch, and make sure to keep the yarn from being trapped underneath your stitching.
  4. Now, pin the bottom side of the horses muzzle and neck together, feeling to see that the basting stitches of the two sides line up as closely as possible. Sew from the point of the nose gusset down to the bottom of the neck. Actually, I started by sewing about an inch from the end of the nose gusset, up to the point, because starting the stitching with all those layers is hard on my machine. It’s easier for me to get the machine going before powering into that thick part. Then I turned the piece around, and sewed down the bottom of the muzzle to the end of the neck. IMG_3232
  5. Leave about a 4-inch opening in the bottom of your horse head. This is approximately what you’ll have:IMG_3235IMG_3238
  6. Now reach in, grab the horse by the nose and gently turn it right-side out.IMG_3249
  7. Here’s your horse all sewn up.IMG_3254

Finishing your hobby horse. This part happened right before we moved back to the states, so the pictures didn’t really happen as much.  Sorry about that.

  1. First, I transferred the pattern pieces for the ears to the felt using the basting technique I mentioned before. IMG_3241IMG_3242
  2. Remove the freezer paper. Then zig-zag stitch all the way around the piece. Then cut it out right next to the zig-zag stitch. IMG_3247
  3. Now here is where you have options. You can leave your ears flat and stitch them on, or you can stitch the bottom corners together and then whip stitch them on kind of sticking out, like I did.
  4. Sew the eyes on like you would any button. Make sure to make it really strong, because little hands will be rougher than you expect.
  5. Stuff that thing. I mean really stuff it. I filled mine with some wool, but you can use fiberfill or whatever you like. I packed the wool in really tightly. Once you get fill to about in line with the bottom of the chin, go ahead and stick the, well, stick, up in there, and pack the stuffing around it. I didn’t use any adhesive or special tricks to get the stick to stay stuck, I just packed the filling tight. Yes, your kid can get it out, but you just stuff it back in, if that happens. If you’ve packed it tight enough, a hollow space for the stick will remain if the stick is removed, as long as you don’t crush the head down after removing the stick. Does that make sense? Hope so.
  6. Finally, you’ll want to slip stitch up the bottom. I just tucked any loose ends in around the stick (if the end of the gusset piece is really long, you can trim it down). Then I slip stitched with heavy-duty sewing thread up and down both sides of the opening to make sure it was really secure. (For some pictures and further explanation of the slip stitch I used, see this post.)

Here they are, ready to ride. You may notice those dandy little felt bridles (my favorite part of the whole project, go figure). Well, those are just some long pieces of felt that I magic braided (but really, you can just regular braid some felt and stitch the end so it stays braided) and then fashioned into a simple loop and halter piece. The d-shaped loops are optional, but they sure add a feeling of authenticity. IMG_6425 IMG_6406Enjoy! Seriously, you might want one for yourself. You’ve been warned. IMG_6412 IMG_6418 IMG_6429

Have a great Wednesday!

Something Worth Sharing

Here she is, our new precious little one. She joined our family on June 26th, after what my husband describes as a “fast and furious” labor and delivery (she was born less than 1 hour after I checked into the hospital). We are thrilled with our new family member. brand new

Well, at first, some of us weren’t so sure.

fia and bella meet elenaBut I think we’re all adjusting pretty well, and this little one is getting lots of well deserved love and attention. sleeping

three seriousHave a wonderful day!

Three Big B’s

For Babka, Baby, and Blog. First the babka. 2 mini loaves happy girl slice 2 slice

Thank goodness this unholy concoction, containing over a pound of butter and sugar, each, and nearly 2 and 1/2 pounds of chocolate (!!) can be frozen, because I could only justify making this recipe by promising that I would freeze two of the three loaves to have when my husband is here to enjoy it. The impetus for this dessert is innocent enough. My mother-in-law shared a loaf of sweet bread studded with chocolate chips, and I thought to myself, hmm, these people are onto something. So I did a quick search at my favorite food blog and came up with chocolate babka. And at first glance, it looked simple enough, a sweet bread dough swirled with chocolate filling and topped with streusel. Closely examining the ingredient list, however, gave me reason to pause. Did I really want to sink that amount of indulgent ingredients into one baking endeavor? The craving won out, however, and it’s not until you’re standing there, looking at two bowls on the counter, one containing your risen dough, and one containing your chocolate/butter/sugar/cinnamon mixture and finding, in alarm, that one is unexpectedly more full than the other, that you realize you may have, perhaps, made a slight error in judgement. Thank goodness it’s too late to turn back at that point, because this babka, oh this babka, it is just that good. With all that said, however, I don’t see myself making it again any time soon. But you should. At least once; it’s one of those things. And after living months without access to an oven, it felt good to have a really, really good excuse to turn on the oven.

Speaking of cravings and ovens, I suppose that now is as good a time as any to announce that I am having a baby. Next month! As in, approximately five weeks from now we’ll be a family of 5. Sorry I haven’t mentioned it before, it’s just that living on the island and being pregnant without having access to good medical care has made me nervous, and I didn’t need anyone else’s well-meant comments or advice making me more nervous. I know I have really wonderful, lovely readers, but the internet is a crazy big place, and I know things like that still happen. So now that I am safely back to the United States, having survived 27-hours plane travel and layovers at 7 months pregnant taking care of two little girls all by myself, I feel comfortable sharing the exciting news. We’re having another little girl, and we are completely thrilled. It is a little bittersweet, because with the baby came the decision that we couldn’t responsibly raise small children on the Galapagos. There are just too many risks involved, mostly from poor-quality water and lack of adequate medical care, that would make it hard to have a new baby there. So we decided to leave our job and home on the Galapagos and move back to the United States.babiesSee, I’m not making this up. This was taken on our last day in Galapagos, when I was 32 weeks (3 weeks ago). My husband is currently finishing up his last month of work and then will come up before (fingers crossed) the baby comes.

The third B is for blog. I realize I’ve been a terribly negligent blogger lately (as in, the last year or so) but that is the trouble with living without internet access. It makes it rather difficult to do things on the internet. Ha. Seriously though, I’ve found that over the year, I’ve kind of lost my taste for the internet. I’ve found many worthwhile things to fill in the time, and frankly, I’m a little disgusted with myself when I get into a rut of looking at pinterest or other social media things for any extended length of time. Not that those things are bad, (and I am in no way casting judgement on people who do enjoy passing the time in this way), it’s just not really my thing, anymore. So, I’m still trying to figure out where I fit in with my blog. I do like sharing, and I love getting feedback from you, especially when there is something I can help you with. And now that I do have access to the internet on a regular basis, I will try to be a more dutiful blog and e-mail correspondent (of course, after the baby comes, all bets are off). But I don’t think I’ll be picking up the pace with posting any time soon. I hope you understand, dear readers.

Have a wonderful afternoon.

Six Years

wedding

Six years ago, today, I married a wonderful, sweet, incredible man. I am so lucky to have him. Today we’re celebrating on separate continents, though, so it’s a little rough. I figured I could just let the day pass by without thinking about it, I could spend it blubbering into a loaf of chocolate babka, or I could celebrate. I decided to go with the third, though it will certainly be a simple celebration, and it will still involve some babka (more on that later). I’m celebrating because I am seriously just so happy to be married to this guy and I love the little family we’ve made together.

joel

family pictureAnd no matter how many years go by, I still look at it as a miracle that two people, growing up in separate hemispheres and virtually worlds apart somehow found each other and made a happy family together. I know there are so many other people I have to thank for this miracle, and that’s why I’m celebrating today, because I am so grateful that this miracle happened. Thanks for everyone who made it happen, and thanks especially to my husband. You are an amazing husband and father. Thank you for all you do. I hope you have a wonderful day too, on your side of the world.

Scrappy Hobby Horse

Do you have piles of felt scraps floating around? Felt food, hair clips, fancy flowers, and a myriad of other felt crafting fun can leave you with quite a heap of felt bits floating around. Or, if you can’t get enough scraps, like me, you might purchase a big old box of scraps from some felt supplier. These scraps can come in handy, but I’ve found them hard to use in bulk, until now. I decided to try piecing some fabric together out of all the scraps. After I got about a third of a yard worth, I decided it was time to make something. Of all the different projects I had in mind for this lovely patchwork fabric, I decided a felt hobby horse was most appropriate, because it’s usually made of re-purposed materials (most commonly a sock, but you get the idea).

collage 1

I drafted my own pattern, fully stuffed muslin and all, and then with a few alterations, I stitched up this guy. My favorite part is the mane. It may look involved, but stitching the mane was almost the easiest part (besides attaching the button eyes, of course). collage 2

It’s stuffed firm with scrap wool (i.e., wool that is too short, scratchy or icky to use for anything else). collage 3

Did I mention my little girl is obsessed with horses? She’s already completely smitten, and I think this may be the start of a beautiful scrappy friendship.

This is another project that I think deserves a tutorial, though it might take me a little while to get around to it. Busy, busy, busy. But life is good.

Have a great day.

Spring Wings

So, I’ve been so busy with things in my real life that I forgot to mention on my blog that I’ve been participating in a crafting competition, SYTYC. You know me, I love to have a good excuse to get some crafts done that I’ve been wanting to do for a while. Here’s my project for the first week. The theme was Spring.

When I think of spring, one of the first things that comes to mind is baby animals. Lambs, bunnies, fluffy little chicks. So for this project, I decided to make something for my own sweet little babies. Something Spring, of course.  wings on wall

wing inspirationHere’s a look at some of my inspiration. I love these paintings of wings by Albrecht Durer. Love.

I made both girls a new set of wings to transform them into little baby birds. I’ve seen the idea floating around Pinterest for a while, and I wanted to do my spin on it. I love them, and the girls do, too.

collage 1


fia

fia running bella sitting

Now my little birds are ready all ready to fly.
running with the wings

happy girls

Well, it looks like I may be out this week, and I’m not surprised, since the theme, knock-off, really isn’t my thing, but if you want, you should go over and vote. Voting goes until Thursday night, I think. There are some nice projects if you are into knock-offs.

Have a great day!

One Year

One year ago we moved to San Cristóbal in the Galapagos Islands. I can’t believe it has been that long. Of course, we’ve only lived on the island for about 7 of those twelve months,  because 5 months of that were spent trying to figure out residency rules, etc., and also a month-long trip home (Oregon) for Christmas. So maybe that’s why it doesn’t quite feel like it’s been a year. Anyways, to celebrate our anniversary  I thought I’d share some pictures of one of my favorite Galapagos cohabitants. from a distancecloser


iguana close up


walking away 2


walking away

profileHave a great day!